

 Knot&Oak
Home How to Tie a Bowline Knot
Knot&Oak
Home How to Tie a Bowline Knot
A fixed loop that won’t slip or jam, and still unties easily after a heavy load.
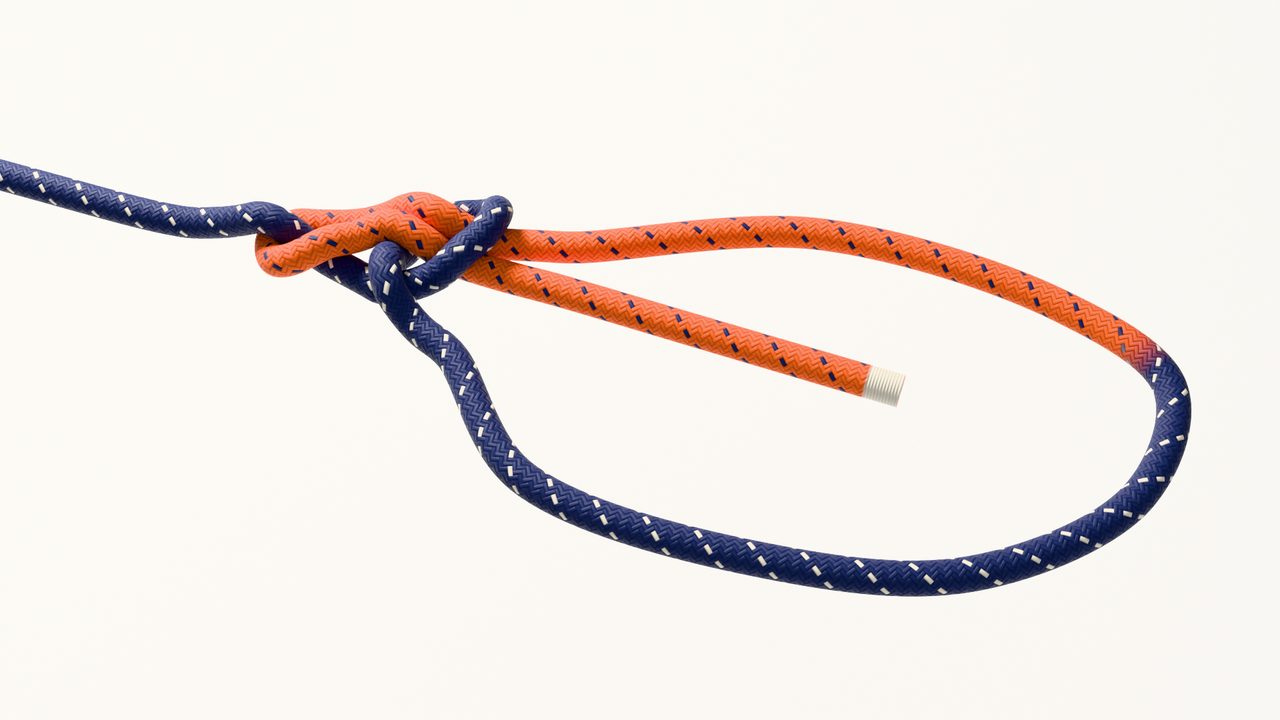 Standing part
Collar
Tail, inside the loop
Main loop
Standing part
Collar
Tail, inside the loop
Main loop
Small loop, up through, round the standing part, back down, pull tight.
“The rabbit comes out of the hole, runs round the tree, and goes back down the hole.”
Turn the rope, zoom into the collar, scrub to any step. Then take the knot quiz.
· Drag to turn · pinch to zoom
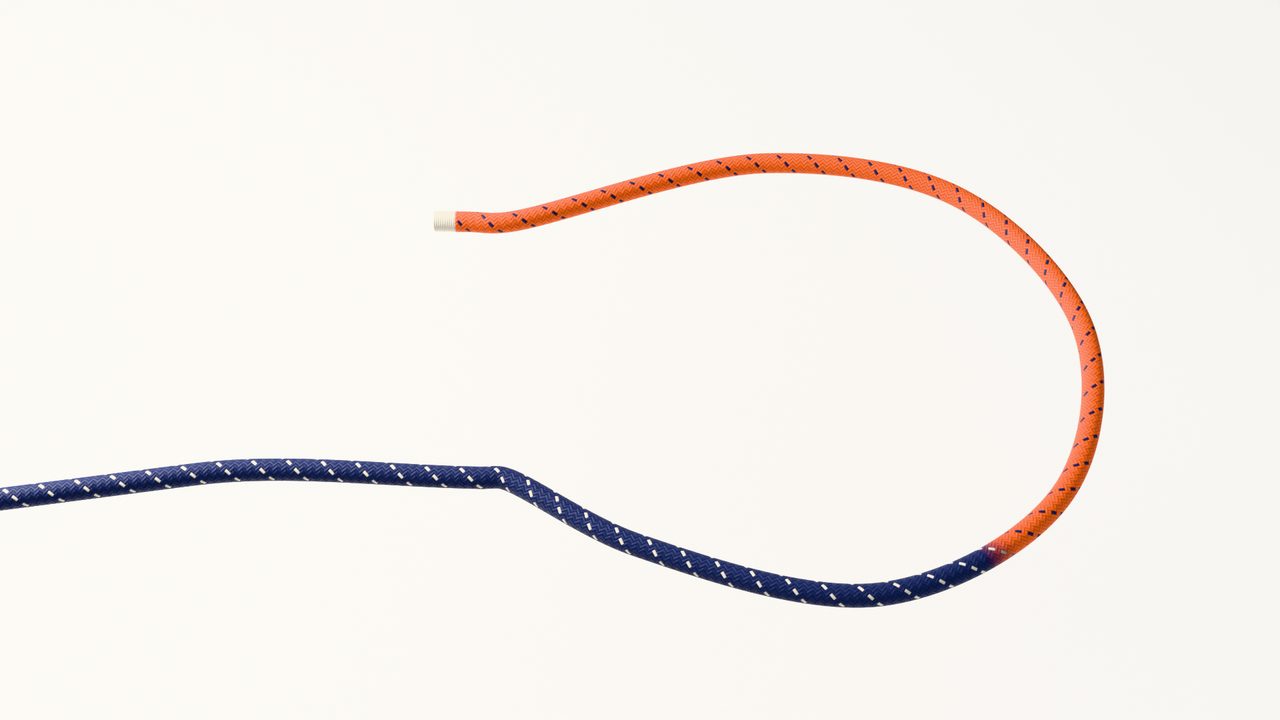 Standing part
Working end
Standing part
Working end
Each clip loops. Tap a clip to pause it, or use ½× to slow it down.
Twist a small loop in the standing part so the side leading to the working end crosses on top.
The crossing. If the working-end side goes underneath, the knot pulls apart.
Bring the working end up through the small loop from underneath.
The rabbit comes out of the hole. The dashed line shows where the end goes next.
Take the end behind the standing part, then back round to the front.
Round the tree. Going behind first makes this the standard bowline.
Push the end back down through the same small loop, right beside itself.
Back down the hole. The tail now lies inside the main loop.
Hold the tail with the side of the loop and pull against the standing part until it sets.
The collar should hug the standing part snugly. Pull slowly.
Use it whenever you need a loop that keeps its size under load, and that you can untie easily afterwards.
Safety: a bowline can shake loose when not under load. For climbing or anything holding a person, use a knot you are trained in, such as a figure-eight follow-through, or back it up.
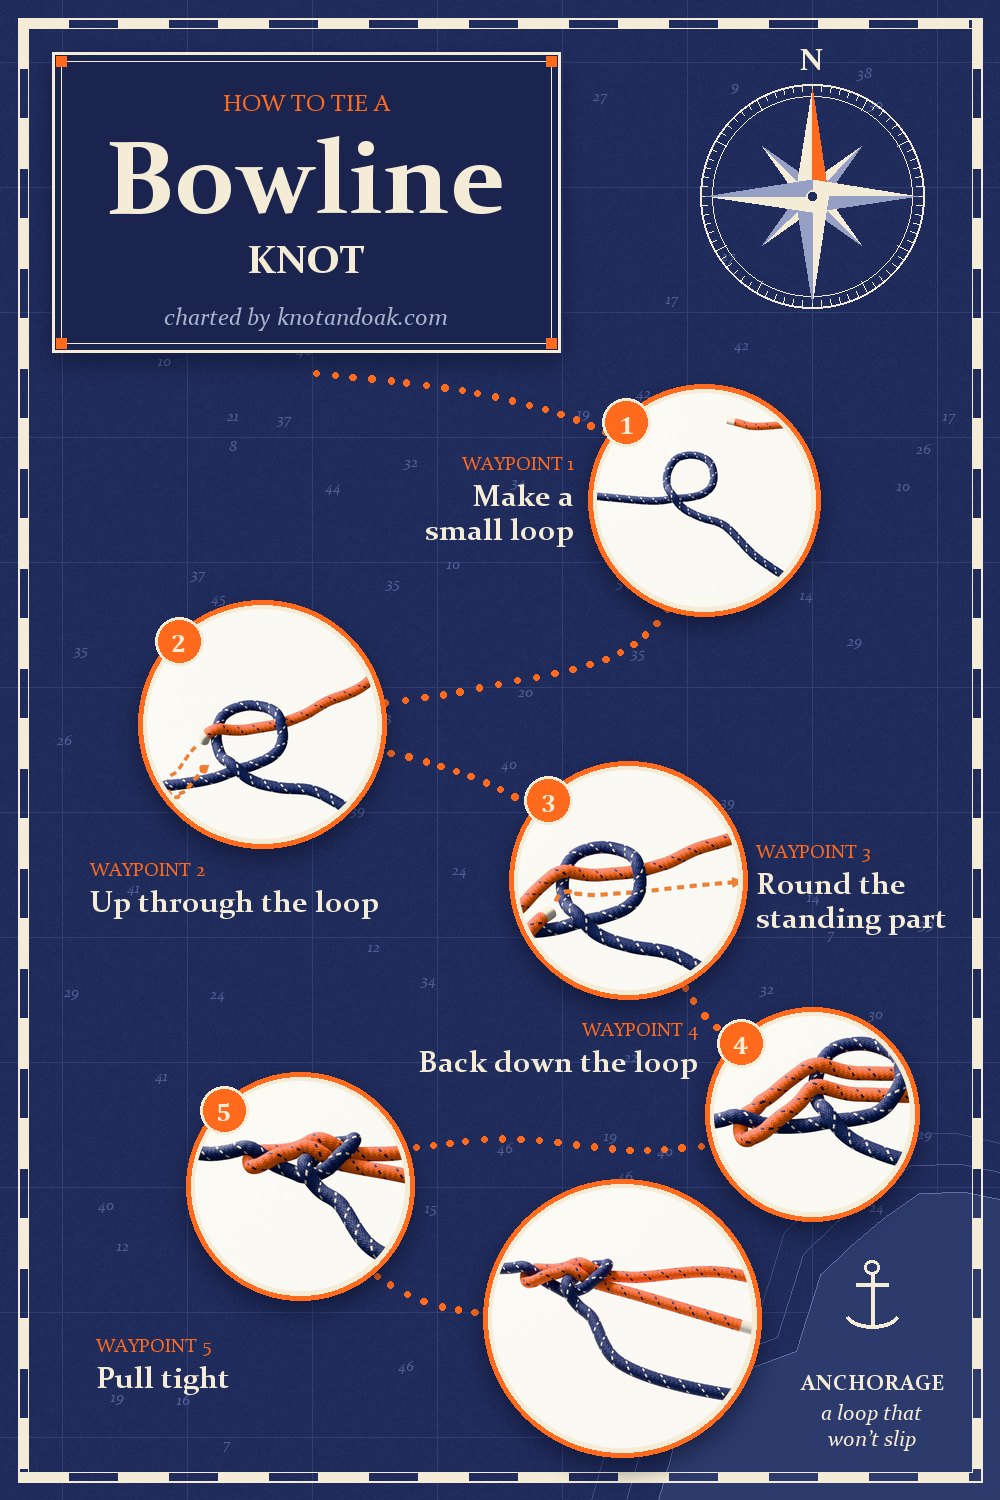
All five steps on one card. Pin it or keep it on your phone for the next time you need a fixed loop.